Django from first principles, part 4

MP 94: Modeling data, and working with a database.
Note: This is the fourth post in a series about building a full Django project, starting with a single file. This series will be free to everyone, as soon as each post comes out.
In the last post we used Django's templating system to build a slightly better home page. More importantly, we put a structure in place that will let us continue to build out the home page as the project grows.
In this post we'll model some of the data that we need to work with in the project. In this early phase of development, that means building a model of a blog. We'll represent a blog in code, and use Django's built-in admin feature to create the first few blogs in the project.
Running management commands
We've got one order of business to tend to before we model any data. So far, we've been running Django management commands such as runserver through the main file. These are the two lines that handle that work:
if __name__ == "__main__":
    execute_from_command_line()
That approach has worked so far, but this code should really be put into a separate file. As the project increases in complexity there's more work to be done each time Django runs a command, or serves the project. With everything in one file, different parts of the project can either conflict or become redundant. Moving the code for running management commands will simplify the main file, and make the project a little more like a standard Django project. 1
Make a new file called manage.py, in the same directory as blogmaker_lite.py. Move these lines out of blogmaker_lite.py, and into manage.py:
import os
from django.core.management import execute_from_command_line

if __name__ == "__main__":
    os.environ.setdefault("DJANGO_SETTINGS_MODULE", "settings")
    execute_from_command_line()
After moving the relevant code out of blogmaker_lite.py, that file should look like this:
from pathlib import Path

from django.urls import path
from django.core.handlers.wsgi import WSGIHandler
from django.shortcuts import render

def index(request):
    return render(request, "index.html")

urlpatterns = [
    path("", index)
]

application = WSGIHandler()
When you run commands like runserver now, you'll need to run them through manage.py. For example, here's how to restart the development server after this change:
(.venv)bml_project$ python manage.py runserver
Note that the call to django.setup() is no longer needed. When execute_from_command_line() is called before any other setup code, it takes care of the same tasks django.setup() was taking care of previously.
Modeling data
When we write code, we're usually trying to model real-world things and ideas in a useful way. The "thing" we want to work with in this project is a blog. What exactly is a blog? We can think of a blog as a container for blog posts. We're looking to keep this as simple as possible, so a good question to ask is:
What's the least amount of information we need in order to create a new (empty) blog?
Every blog should have a title. Along with the title, we'll let users enter a brief description. Blogs have authors as well, but we'll come back to that a little later in the process.
Where should we write model code?
We're almost ready to write some code that represents a blog. We'd like to keep things simple, which means we'd like to just keep working in the main blogmaker_lite.py file. But that won't work, and it's important to understand why.
Django is a web framework; it helps us build projects that are served over the internet. Almost every web-based project, whether backed by Django or some other framework, stores its information in a database. So we'll write a bit of model code representing a blog, but Django will have to do a bunch of work behind the scenes with that code:
- Django will have to make space in the database for the information we're modeling.
- Django will have to manage writing information to the database.
- Django will have to manage reading information from the database.
This is more work than can reasonably be done in one file, especially as a project evolves beyond its earliest stages.
To solve the problem of managing this complexity, Django has the concept of apps. An app in Django is a part of a larger project, with a specific purpose. We tend to think of an app as a standalone program that can be installed somewhere, such as a phone, tablet, or laptop. When Django was first being developed, that concept didn't really exist yet. An app in Django is just a part of the overall project. You can have as many apps as you want in a project, and mature projects almost always have many apps that work together.
Django apps are modular and distributable; in your real-world projects you'll use a number of apps included with Django itself, as well as some third-party apps that take care of common needs in web projects. For example, user accounts will be managed by an app that's dedicated to that purpose.
At this stage of the project, we'll make an app called blogs to manage our model code. In practice, "make an app called blogs" just means "work in a folder called blogs".
Writing model code
Now that we've decided what kind of information to start with and where it should go, we're ready to write some code. Make a folder called blogs, at the same level as blogmaker_lite.py:
(.venv)bml_project$ mkdir blogs
(.venv)bml_project$ tree
├── blogmaker_lite.py
├── blogs
├── manage.py
├── settings.py
└── templates
    ├── base.html
    └── index.html
In the blogs folder, make a file called models.py. Enter the following code in models.py:
from django.db import models

class Blog(models.Model):
    title = models.CharField(max_length=200)
    description = models.TextField()
    date_added = models.DateTimeField(auto_now_add=True)

    def __str__(self):
        return self.title
This is a short file, but there's a lot going on here. Much of the boilerplate code that manages a model within the context of a larger project is contained in the built-in models.Model class. Our class, Blog, inherits from this class. If you're curious to see how much goes into this, take a glance at the source for the models.Model class.
The first two lines of Blog define the two pieces of information mentioned earlier: each blog's title and description. The variable title points to an instance of models.CharField. We call these kinds of variables fields, because they correspond to fields in a database table. The title field is a string that can contain up to 200 characters. The description field is an instance of models.TextField. This is similar to a CharField, without a defined limit on the length of the data.
The date_added field records a timestamp whenever a new blog is created. The auto_now_add argument tells Django to create the timestamp automatically.
Most models contain more information than can easily be presented in a terminal environment, or in a dashboard. The __str__() method is called whenever an instance of Blog needs to be presented in these kinds of environments. This is an optional method, but if you don't include it Django will just present all Blog instances as Blog object (1) and Blog object (2). Here, we're telling Django to display the title of each blog whenever we access an instance of Blog in one of these environments. 2
For more about modeling data in Django, see the Models documentation page.
Updating settings
We need to add a few settings to tell Django where to find our app, and how to manage the database. These are the changes that need to be made to settings.py:
...
TEMPLATES=[
   ...
]

INSTALLED_APPS=["blogs"]

DATABASES={
    'default': {
        'ENGINE': 'django.db.backends.sqlite3',
        'NAME': Path(__file__).parent / 'db.sqlite3',
    }
}
DEFAULT_AUTO_FIELD="django.db.models.BigAutoField"
The INSTALLED_APPS setting tells Django which apps have been installed to this project. Each app corresponds to a folder, so this also tells Django where to look for each app's resources. We'll be adding some built-in apps to this list as we bring more of Django's features into the project.
The DATABASES setting tells Django to use the SQLite database by default. SQLite is a database that runs as a single file. You don't need to install anything to use it, and it's great for local development. We'll specify a different database for the deployed version of the project near the end of the series. All Django needs in order to use SQLite is the path to the database file. Here we're specifying the file db.sqlite3, in the project's root directory.
Finally, the DEFAULT_AUTO_FIELD setting tells Django how to manage auto-incrementing fields such as the ID for each new blog.
If you save these changes when runserver is active, an empty SQLite database will probably be created automatically. If that doesn't happen, the database will be created in one of the next few steps.
Databases and migrations
A database is one of the most critical parts of an actual real-world project. In many cases, it's the most critical part of the project. Once your project is up and running and people are using it, maintaining the integrity of that data is a make-or-break aspect of your project.
When we take a database from one state to another, we call that a migration. To help you manage your database well, Django can examine the state of your model code and generate a migration file that automatically updates the database so it's consistent with your code:
(.venv)bml_project$ python manage.py makemigrations blogs
Migrations for 'blogs':
  blogs/migrations/0001_initial.py
    - Create model Blog
The command makemigrations generates a migration file for a specific app in your project. Here, it created the file 0001_initial.py, in a migrations folder located inside the blogs directory. This is part of why we made a dedicated folder for this app. Without this structure, the project would end up cluttered with a bunch of migrations files, and it would quickly become unclear what code each migration file was supposed to correspond to.
You shouldn't modify the 0001_initial.py file unless you have a specific reason to do so. But you should definitely open that file and see what Django generated for you, based on the code in models.py. The more you work with Django, the better you'll understand this kind of auto-generated code.
Running the migration
The migration file has been generated, but the database hasn't actually been migrated yet. To do that, we need to run the migrate command:
(.venv)bml_project$ python manage.py migrate
Operations to perform:
  Apply all migrations: blogs
Running migrations:
  Applying blogs.0001_initial... OK
Here we can see that Django applied the 0001_initial migration for the blogs app, and that everything turned out OK.
Now that we have a database matching the current state of our codebase, we can start entering some data.
The Django admin site
One of the most valuable parts of Django for many people is the admin site. This is a built-in app that lets you work with your data as soon as you've written a model and migrated your database.
Admin settings
We need to enable a number of settings in order to use the admin site:
...
TEMPLATES=[
    {
        "BACKEND": "django.template.backends.django.DjangoTemplates",
        "DIRS": [Path(__file__).parent / "templates"],
        "APP_DIRS": True,
        'OPTIONS': {
            'context_processors': [
                'django.template.context_processors.request',
                'django.contrib.auth.context_processors.auth',
                'django.contrib.messages.context_processors.messages',
            ],
        },
    }
]

INSTALLED_APPS=[
    "blogs",
    "django.contrib.admin",
    "django.contrib.auth",
    "django.contrib.contenttypes",
    'django.contrib.sessions',
    "django.contrib.messages",
    "django.contrib.staticfiles",
]

MIDDLEWARE = [
    'django.contrib.sessions.middleware.SessionMiddleware',
    'django.contrib.auth.middleware.AuthenticationMiddleware',
    'django.contrib.messages.middleware.MessageMiddleware',
]

DATABASES={
    ...
}
DEFAULT_AUTO_FIELD="django.db.models.BigAutoField"

STATIC_URL="static/"
There's a lot of changes here, but don't spend too much time trying to understand individual lines. Almost all these settings are included by default in settings.py when you follow the standard startproject and startapp approach to building a new project.
The built-in templates for the admin pages are stored in the admin app, so we set APP_DIRS in the TEMPLATES setting to True. This tells Django to continue looking in our main templates directory for template files, but also look for a templates directory in each app's folder as well. The admin templates also need some processors enabled, in order to prevent unauthorized users from accessing the admin site.
The additions to INSTALLED_APPS are built-in apps that help manage the admin site, auth workflows, various kinds of content, and more.
In Django, middleware is code that processes the user's request at various points in the request-response cycle. For example, one of the MIDDLEWARE entries you see here helps manage user sessions.
Finally, the admin site requires some CSS and JavaScript files. These are referred to as static files, because they don't require any processing by the server. In a deployed project, these can be served much more simply than the dynamic parts of the project. The STATIC_URL setting tells Django where to look for the static files needed for the admin site. Soon we'll be working with our own static files as well.
Running another migration
We've included a number of additional apps, each of which can have its own migration files. We need to run the migrate command again, in order to structure the database so all these apps can function:
(.venv)bml_project$ python manage.py migrate
Operations to perform:
  Apply all migrations: admin, auth, ..., sessions
Running migrations:
  Applying contenttypes.0001_initial... OK
  Applying auth.0001_initial... OK
  Applying admin.0001_initial... OK
  Applying admin.0002_logentry_remove_auto_add... OK
  ...
  Applying sessions.0001_initial... OK
You can see a number of migrations being applied in order to support some of the built-in functionality that Django offers.
Registering the Blog model and including URLs
Now we have to register our model with the admin site, and include the admin URLs. Make these changes to blogmaker_lite.py:
...
from django.shortcuts import render
from django.contrib import admin

from blogs.models import Blog

admin.site.register(Blog)

def index(request):
    ...

urlpatterns = [
    path("admin/", admin.site.urls),
    path("", index)
]

application = WSGIHandler()
We first import the admin module, and our Blog model. We then call admin.site.register(), which tells Django to let the admin site manage the Blog model. Finally, we include the collection of admin URLs, and assign them to paths starting with admin/. 3
Loading the admin site
You can now see the login screen for the admin site, at http://localhost:8000/admin/. Here's what you should see:
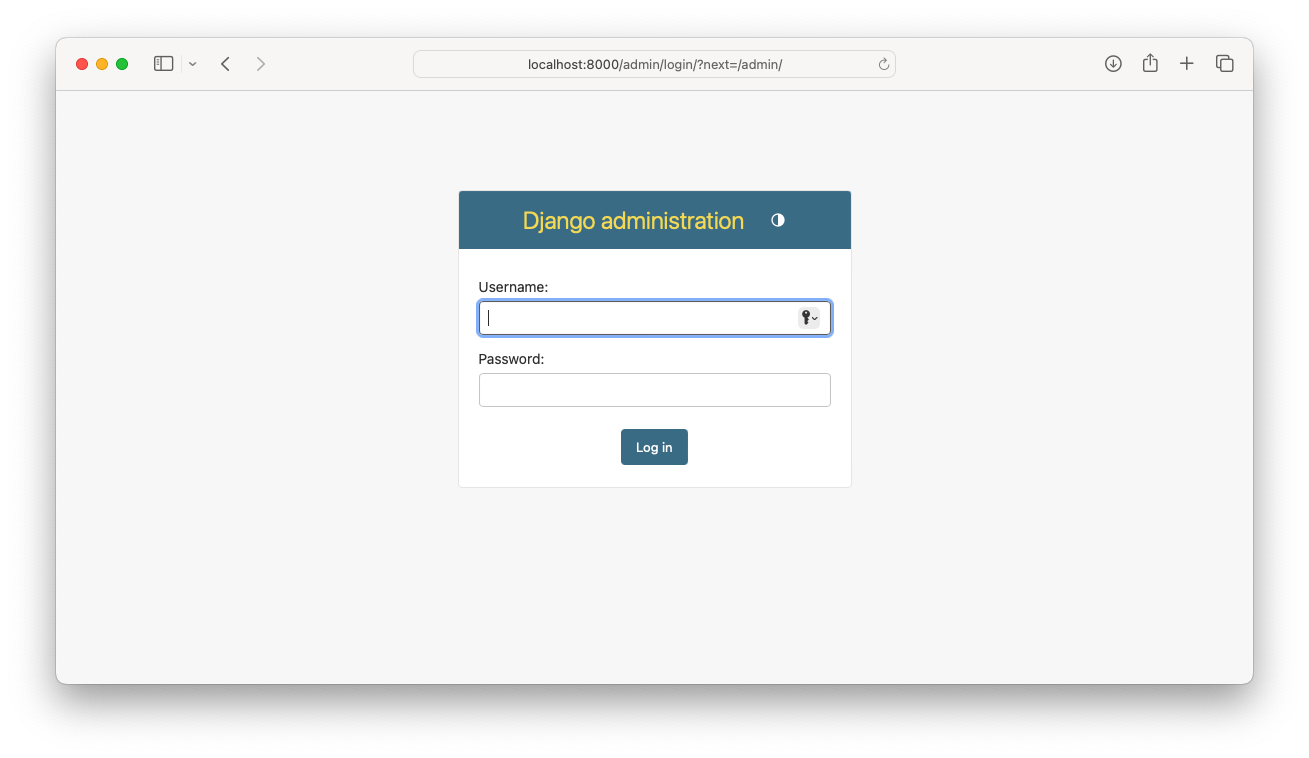
We haven't created a site administrator account, so you won't be able to log in quite yet. Let's do that next.
Creating a superuser
Only site administrators, called superusers, can log into the admin site. You can create a superuser in a terminal session:
(.venv)bml_project$ python manage.py createsuperuser
Username (leave blank to use 'eric'): eric_admin
Email address:
Password:
Password (again):
Superuser created successfully.
The createsuperuser command lets you enter a username, email address, and password for a new superuser. You can leave the email field blank. 4
Logging into the admin site
With an active administrator account, you can log in to the admin site. After logging in, this is what you should see:
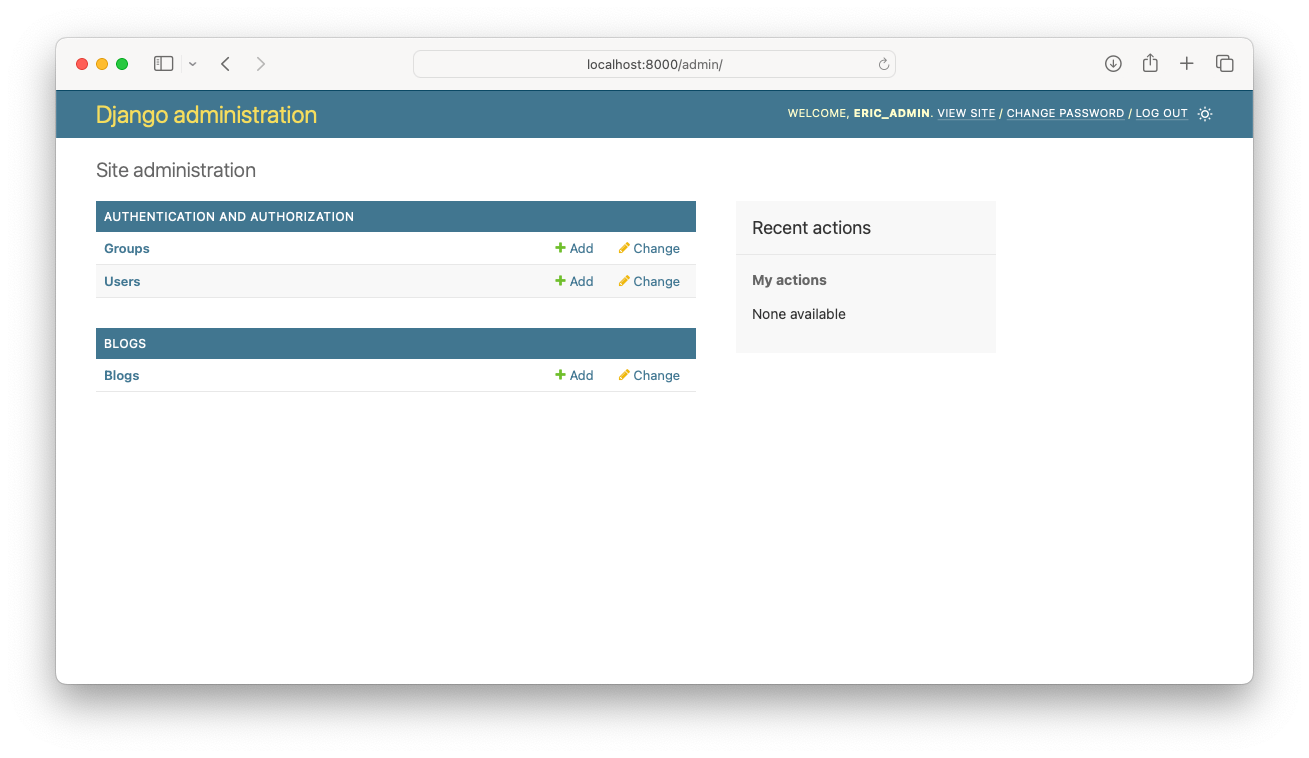
Once you're logged in, you'll see the default interface for managing information associated with your project. By default you can manage users and groups. Because we registered Blog with the admin site, you can manage blogs here as well.
Creating some blogs
Now that the admin site is enabled and we have an administrator account, we can make a couple blogs to work with.
To make a new blog, click Add on the Blogs line in the admin panel. You should see a new page that lets you enter the information necessary to create a new blog:
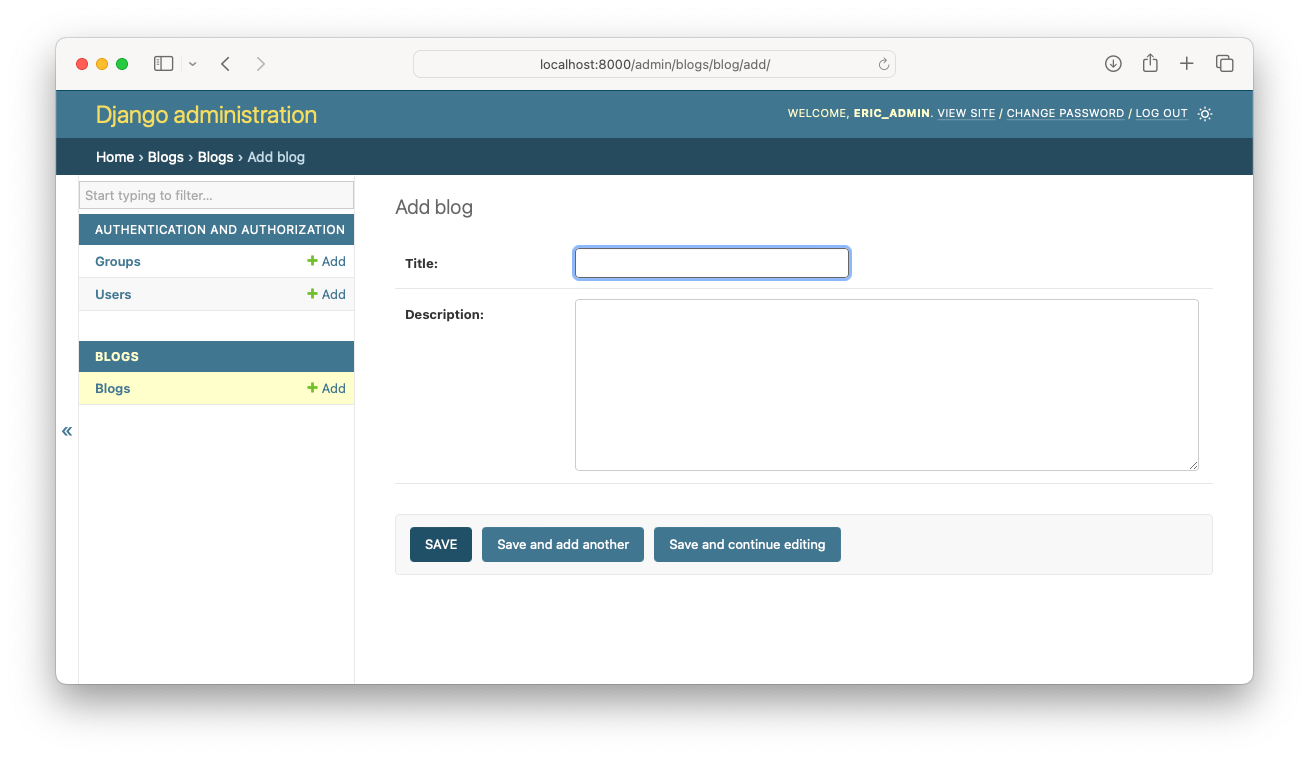
Go ahead and enter a title and description for your first blog. Then make a couple blogs, so we have some data to work with as we develop the project further. 5
Viewing your blogs
The admin site lets you quickly explore all the data that's stored in your database. If you go back to the home page and click Blogs, you should see the blogs you just created:
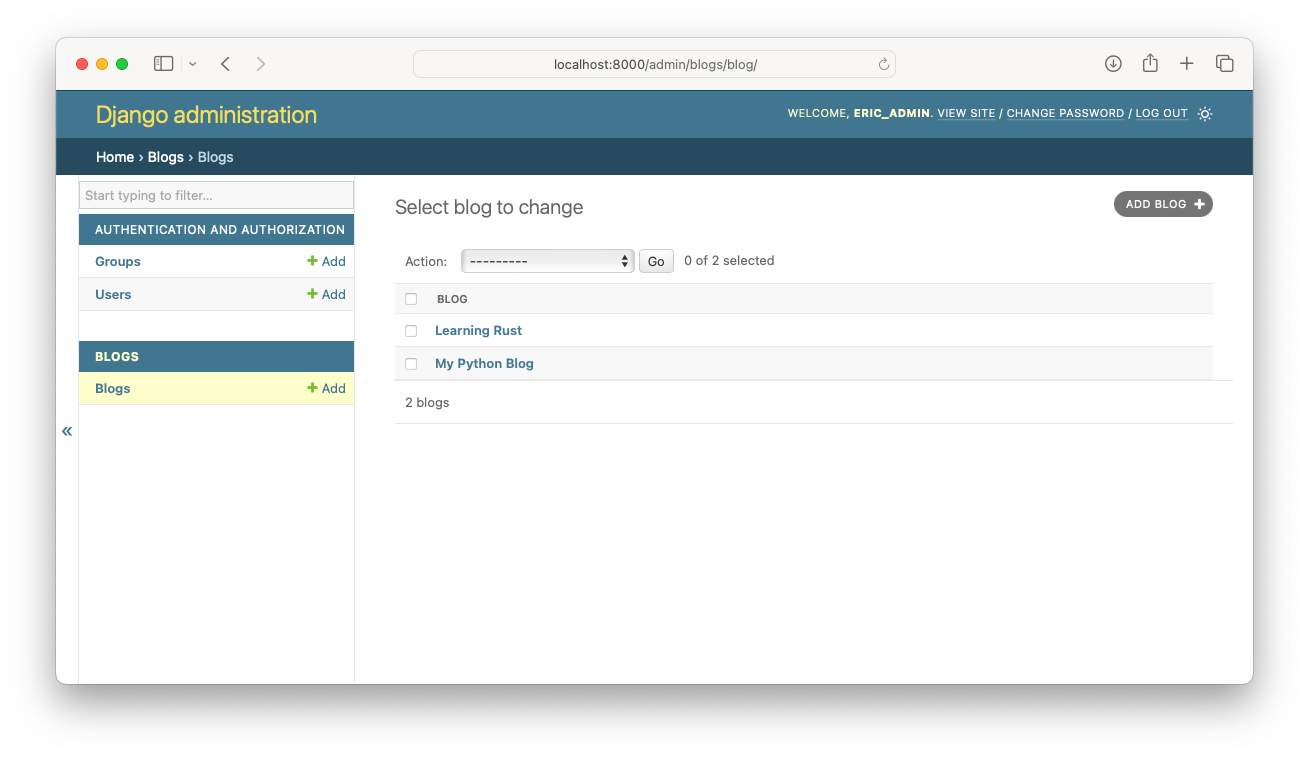
If you click on an individual blog, you should see all the information specific to that blog. 6
Conclusions
Our directory structure is looking more complex now that we're starting to work with data:
(.venv)bml_project$ tree
├── blogmaker_lite.py
├── blogs
│   ├── migrations
│   └── models.py
├── db.sqlite3
├── manage.py
├── settings.py
└── templates
    ├── base.html
    └── index.html
However, you should be able to recognize the reason for each of these files and directories at this stage in the project's development.
We did a lot of work in this post, but now that we have all this infrastructure set up it will be much easier to create the model for blog posts. We'll build and use that model in the next post.
Keep in mind that Django doesn't require you to do most of the work shown in this post. When you run startproject and startapp, most of the code shown here is automatically generated for you. As always, the main point of this series is to clarify exactly why all that code is generated in the first place.
Resources
You can find the code files from this post in the django-first-principles GitHub repository.
The commits from this post are on the part_4 branch. Commits for this branch start at 6d25197, with the message Moved code for running commands to manage.py.
If you're interested in the finer details, we'll have a problem when registering the Blog model with the admin site later if we keep execute_from_command_line() in the main file. We'll need to call django.setup() in order to register a model with the admin. But running a command will also initiate some setup work, which results in the Blog model being registered twice. This generates an error.
There are a number of ways to address this issue, but the simplest is to move the code for running commands into a separate file. We're going to want to do that at some point anyway, and this is a reasonable time to make that move.
For more about __str__() and other double-underscore (dunder) methods, see MP 44.
In practice, it's good to serve the admin site over a path other than admin/. There are all kinds of automated attacks against URLs starting with admin/. These attacks are always trying to find sites with an improperly configured admin app. You can mitigate many of these attacks by simply using a different name in the call to path() in urlpatterns.
Also, it's slightly better to include a bare URL path last in the list of URL patterns. For more about this, see MP 58.
To be more specific, a superuser is a user with all permissions enabled by default. You can set custom permissions on users, so it's a good practice to create several levels of administrators, with only the privileges needed for each role.
When first learning Django, it's simplest to just create a superuser at this point.
Don't put too much thought into what you enter, though. When building a project from scratch, it's not uncommon to end up with a broken database. This can usually be fixed without losing data if necessary, but that can be more work than you want to do during the development phase. When this happens you can simply destroy your database and create an empty database that matches the current state of the project. You won't want to do that if you've entered a bunch of data by hand already.
If you want to see for yourself the role that __str__() in the Blog model plays in the admin site, try removing or modifying the __str__() method and then reloading the Blogs admin page.
For example if you change the name to __str__dont_use(), Django won't find a __str__() method when rendering that page. Instead of seeing titles such as My Python Blog, you'll see entries like Blog object (1).